The Safe Way to Clean Coloured Render
The safest way to clean coloured render is to use a controlled softwashing process: inspect the render, identify the staining, carry out a small test patch, apply an appropriate cleaning solution at low pressure, allow safe dwell time, gently rinse where required, and avoid aggressive pressure washing or harsh chemical misuse. Coloured render should be treated as a delicate exterior finish because the colour coat, texture and surface binder can be damaged by excessive pressure, over-strong chemicals, scrubbing, heat or poor rinsing practice.
For UK exterior cleaning contractors, facilities managers, property maintenance teams and serious DIY users, the goal is not simply to make the wall look clean on the day. The aim is to remove organic growth safely, protect the colour and texture of the render, manage chemical risk, comply with best practice, and reduce the chance of rapid regrowth.
In practical terms, that means understanding the render system in front of you, recognising whether the staining is green algae, red algae, black biological growth, atmospheric soiling, rust, carbon staining or mineral run-off, and choosing the least aggressive method that will achieve a reliable result.
Why Coloured Render Needs a Different Cleaning Approach
Coloured render is not the same as bare brick, concrete slabs or block paving. Many modern render systems are designed as decorative, weather-resistant external finishes. They often have a textured surface that traps moisture and airborne contamination, which makes them prone to biological growth in shaded or damp areas.
Common coloured render systems found across the UK include:
- Silicone render
- Acrylic render
- Monocouche render
- Mineral render
- Thin-coat render systems
- Through-coloured render such as K-Rend, Weber and Parex-type finishes
- Painted render and previously coated render
The problem is that these surfaces can be sensitive. Strong pressure can cut into the surface, leave wand marks, expose aggregate, open pores, force water behind the render system or cause patchy colour loss. Likewise, poor chemical practice can bleach or streak the finish, damage trims and fittings, harm plants, or leave unsightly residue.
This is why cautious softwashing, not brute-force washing, is usually the preferred method for cleaning coloured render when biological growth is the main issue.
What Usually Makes Coloured Render Look Dirty?
Before cleaning any coloured render, identify the type of contamination. Different stains need different treatment. Treating every mark as “algae” is one of the most common mistakes on site.
| Contamination | Typical Appearance | Common Cause | Likely Cleaning Approach |
|---|---|---|---|
| Green algae | Green film or streaking, often on shaded elevations | Moisture, shade, poor air movement, nearby vegetation | Softwashing with suitable biocidal cleaning method |
| Red algae | Pink, red or orange staining, often on light renders | Airborne spores, damp porous surfaces, weather exposure | Targeted softwash treatment with realistic expectations on dwell and possible repeat treatment |
| Black biological growth | Dark spotting or staining | Lichen, mould, pollution and long-term moisture retention | Softwash treatment, longer dwell, possible staged cleaning |
| Carbon and traffic film | Grey or black soiling, often near roads or vents | Pollution, exhaust deposits, airborne grime | Detergent-assisted low-pressure cleaning |
| Rust staining | Orange-brown runs from metal fixings or rails | Corroding metal, irrigation, fixings, nearby steel | Specialist rust stain remover, not standard render wash |
| Mineral run-off | White, grey or chalky deposits | Efflorescence, lime, hard water, cementitious residue | Careful diagnosis; may need specialist treatment and testing |
If the issue is organic staining, softwashing is normally the most suitable starting point. For more detail on why green staining develops, SoftWash UK has a useful guide on green algae on render. Red staining can behave differently and may need a more patient approach; see the Knowledge Centre guide to red algae on render.
Softwashing Coloured Render: The Safe Principle
Softwashing is a controlled low-pressure cleaning method that uses cleaning chemistry to break down and treat organic contamination. The pressure is used mainly to apply and rinse, not to mechanically blast the surface.
On coloured render, the safe principle is simple:
- Use the lowest effective chemical strength.
- Use low pressure for application and rinsing.
- Test first in an inconspicuous area.
- Control dwell time carefully.
- Keep the surface wet enough for the chemistry to work but do not allow products to dry out.
- Protect plants, metals, painted surfaces, glass, electrical fittings and surrounding materials.
- Follow product labels, Safety Data Sheets and site-specific risk assessments.
When carried out correctly, softwashing can clean coloured render effectively without the scarring, striping and surface damage commonly caused by aggressive pressure washing. However, the word “soft” does not mean casual or risk-free. Contractors still need chemical competence, correct PPE, application control, safe access planning and environmental awareness.
Can You Pressure Wash Coloured Render?
Pressure washing coloured render is risky and should not be the default method. In some cases, a very controlled low-pressure rinse may be appropriate, but high-pressure cleaning, turbo nozzles and close-range jetting can permanently damage the finish.
When contractors ask about pressure washing render, the answer depends on the render type, age, condition and staining. Even where rinsing is needed, the safest approach is usually fan-pattern, low-pressure rinsing from a sensible distance after chemical treatment has done the cleaning work.
| Method | Risk to Coloured Render | Best Use | Common Problem |
|---|---|---|---|
| High-pressure washing | High | Rarely suitable for delicate render | Etching, wand marks, water ingress, patchy finish |
| Turbo nozzle | Very high | Not recommended on coloured render | Cuts into texture and causes irreversible damage |
| Low-pressure rinse | Low to moderate | After softwash treatment where rinsing is required | Still risky if too close or too powerful |
| Softwashing | Low when done correctly | Organic growth, algae, mould and general biological staining | Problems occur if chemicals are too strong or allowed to dry |
Step-by-Step: The Safe Way to Clean Coloured Render
1. Inspect the Render Before Quoting or Cleaning
Good render cleaning starts before any chemical is mixed. Walk the elevations and look closely at the condition of the surface. Use photographs to record existing defects, staining and vulnerable areas.
Check for:
- Cracks, blown render or hollow-sounding areas
- Loose or friable surface texture
- Previous pressure washing marks
- Colour fading, chalking or patchy coatings
- Damaged beads, trims, sealants and expansion joints
- Water ingress points around windows, vents and pipes
- Nearby plants, ponds, lawns and sensitive drainage
- Lead, zinc, copper, aluminium, powder-coated metals and painted features
If the render is failing, cleaning may expose or worsen the problem. In those cases, make the client aware before starting. Cleaning does not repair defective render.
2. Identify the Render Type Where Possible
Different render systems tolerate cleaning differently. K-Rend and other through-coloured monocouche renders are common in the UK, but they are still not immune to damage. Thin-coat silicone and acrylic renders are often applied over insulation systems, meaning water ingress and impact damage are serious concerns.
If you are cleaning K-Rend specifically, the SoftWash UK Knowledge Centre article on K-Rend cleaning is a useful supporting resource. It explains why soft, controlled cleaning is generally preferred over aggressive pressure washing.
3. Carry Out a Test Patch
A test patch is essential on coloured render. Choose a discreet area, ideally low down or behind a downpipe, and replicate the intended process on a small scale.
The test patch helps confirm:
- Whether the staining responds to the chosen treatment
- Whether the colour is stable
- Whether the surface becomes patchy or chalky
- Whether rinsing is required
- Whether a second staged treatment may be safer than one strong application
On older render, it is not unusual to find that one elevation behaves differently from another. South-facing walls may be more UV-faded, while north-facing walls may hold more algae and moisture.
4. Protect the Site Properly
Before applying any cleaning solution, prepare the working area. This is especially important on commercial sites, schools, care homes, retail units and residential properties with planted borders.
Best practice includes:
- Wetting down plants before and after cleaning where appropriate
- Temporarily covering delicate planting where safe and practical
- Diverting or controlling run-off where required
- Protecting electrical fittings, doorbells, external sockets and cameras
- Checking window and door seals
- Keeping people and pets away from the work area
- Using barriers and signage where members of the public may pass nearby
Contractors should work from a site-specific risk assessment and method statement. SoftWash UK supplies a Risk Assessment and Method Statement pack for exterior cleaning, which can help professional operators formalise safe systems of work rather than relying on memory or informal site habits.
5. Choose the Right Cleaning Chemistry
For biological staining, contractors commonly use softwash chemicals based on oxidising agents or biocidal active ingredients, depending on the objective, surface and desired residual effect. The key is not simply what product is used, but how it is selected, diluted, applied and controlled.
Professional users should always read the product label and Safety Data Sheet, wear suitable PPE, and understand compatibility with the surface and surrounding materials. If you are comparing options, the SoftWash UK soft wash chemicals range is organised for exterior cleaning applications and is a useful starting point for selecting appropriate products.
Surfactants can also be useful on textured coloured render because they help the solution cling to vertical surfaces and improve contact time. A product such as Clever Wash Surfactant may help reduce run-off and improve coverage, particularly on roughcast or textured render, when used according to the manufacturer’s instructions.
6. Apply at Low Pressure With Good Control
Coloured render should be treated carefully from the bottom up or in controlled sections to avoid streaking and uneven drying. On larger elevations, work in manageable areas so you can maintain dwell time and prevent the product drying on the surface.
Useful application principles include:
- Apply evenly and avoid flooding the wall.
- Do not allow cleaning solution to dry on the render.
- Keep overlaps consistent to avoid patchy results.
- Avoid windy conditions that increase drift risk.
- Work away from open windows, vents and air intakes.
- Do not overspray onto vehicles, untreated metals or sensitive surfaces.
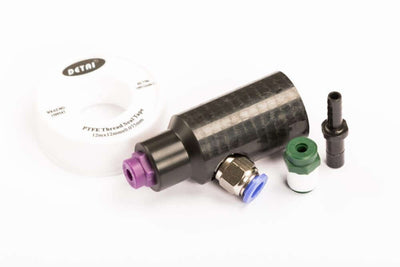
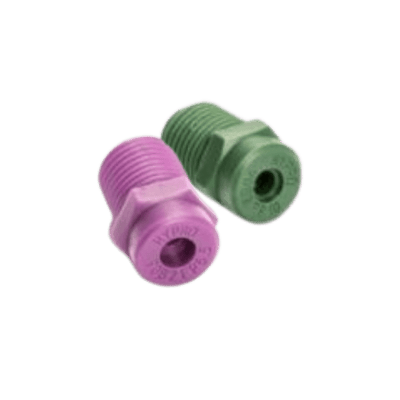
For controlled application from the ground, appropriate exterior cleaning equipment can reduce ladder use and improve safety. A water fed pole softwash nozzle can be helpful for applying solution accurately to higher render sections, provided the system is compatible with the chemical being used and the operator is trained in safe use.
7. Manage Dwell Time Carefully
Dwell time is the period the cleaning solution remains active on the surface. It is one of the most important parts of render cleaning. Too short, and the staining may not break down. Too long, especially in warm or windy conditions, and the product may dry and leave marks.
Experienced operators adjust dwell time based on:
- Temperature
- Sun exposure
- Wind
- Severity of contamination
- Render texture
- Chemical strength
- Manufacturer guidance
On delicate or faded coloured render, two mild applications can be safer than one aggressive treatment. This is particularly relevant for heavy red algae or long-established black staining.
8. Rinse Gently Where Required
Some render cleaning processes require rinsing; others may be designed to remain on the surface, depending on the product and treatment objective. Where rinsing is required, keep it gentle.
Use a low-pressure fan rinse, not a cutting jet. Avoid driving water into vents, cracks, weep holes, insulation systems or window seals. Stand back and let water flow over the surface rather than forcing it into the render.
On very textured render, rinsing may not remove every dark shadow immediately. Some biological staining continues to fade after treatment as weathering and residual action take effect. Set expectations clearly with the client.
9. Review the Result and Document the Work
After cleaning, inspect the wall again. Record before-and-after photographs, any remaining marks and any defects exposed during cleaning. This is especially important for commercial and facilities management work where maintenance records matter.
Recommend realistic aftercare. If the property has overhanging trees, poor drainage, shaded elevations or constant dampness, biological growth is likely to return over time. Periodic maintenance treatments are usually safer and more cost-effective than letting staining build up for years.
Common Mistakes When Cleaning Coloured Render
Using Too Much Pressure
The most visible mistakes on coloured render are usually pressure-related. Wand stripes, chequerboard patterns and clean “cut” patches are difficult or impossible to hide without re-coating. If a wall has a soft, chalky or weathered surface, pressure can remove more than dirt.
Assuming Stronger Chemical Means Better Cleaning
Over-strong chemical mixes can create bleaching, streaking, plant damage, metal corrosion and unnecessary exposure risk. Professional softwashing is about correct strength, coverage and dwell time, not using the harshest possible mix.
Skipping the Test Patch
A test patch may feel slow, but it is faster than handling a complaint. Coloured render can react differently depending on age, pigment, coating condition and previous cleaning history.
Cleaning in Full Sun
Direct sunlight can cause rapid drying, uneven reaction and visible streaks. Whenever possible, work around the building, follow the shade and avoid hot surfaces.
Ignoring Non-Organic Stains
Rust stains, lime runs, cement residue and carbon deposits may not respond to standard softwashing. Misdiagnosis wastes time and can increase surface risk. Treat the stain, not just the wall.
Failing to Protect Plants and Metals
Render cleaning often takes place close to borders, lawns, aluminium frames, galvanised fixings, lead flashing and decorative metalwork. Pre-wetting, masking, rinsing and careful application are part of the job, not optional extras.
Will Softwashing Damage Coloured Render?
Softwashing should not damage coloured render when it is carried out correctly on a suitable surface using appropriate dilution, dwell time, application method and rinsing practice. Problems usually arise from poor technique, excessive chemical strength, inadequate testing, dry-out, unsuitable surfaces or lack of operator training.
If you are weighing up the risks, SoftWash UK has a dedicated Knowledge Centre article answering the question: can softwashing damage render. It is a sensible read for contractors, property managers and clients who want to understand the difference between professional softwashing and careless chemical application.
Safety, Compliance and Professional Standards
Cleaning coloured render is not only a cosmetic task. It involves working at height, chemical handling, public safety, environmental protection and property risk. UK contractors should treat render cleaning as a controlled professional activity.
Key safety considerations include:
- Site-specific risk assessment and method statement
- Suitable PPE, including eye, skin and respiratory protection where required
- Safe chemical storage, transport and dilution
- Access planning, including avoiding unsafe ladder work
- Control of overspray and public exclusion zones
- Understanding Safety Data Sheets
- Run-off control and drainage awareness
- Emergency procedures for spills, splashes and accidental exposure
For contractors who want to reduce costly mistakes and work to a more professional standard, the SoftWash UK Soft Wash Training Course covers practical principles around chemical use, equipment, surfaces, safety and application methods. Training is particularly valuable for teams moving from pressure washing into softwashing, because render cleaning requires a different mindset.
Best Practice Tips From Real-World Render Cleaning
On site, small details often make the difference between a clean, even result and a patchy job. These are practical habits experienced operators use regularly:
- Always photograph elevations before starting, especially cracks and staining.
- Ask the client whether the render has been painted, sealed or cleaned before.
- Check weather conditions before mixing and applying chemicals.
- Keep windows shut and confirm ventilation points before spraying.
- Work in shade where possible to prevent premature drying.
- Use a surfactant on vertical textured surfaces where appropriate.
- Do not chase every faint shadow with pressure; some marks fade after treatment.
- Return for a light second treatment if needed rather than over-treating on day one.
- Rinse metals, glass and surrounding areas thoroughly where required.
- Leave the site safe, tidy and clearly documented.
For facilities managers, scheduled maintenance is often better than reactive deep cleaning. A building with render cleaned lightly every one to three years usually presents fewer risks than one left until the walls are heavily colonised with algae and staining.
When Not to Clean Coloured Render
There are times when you should delay cleaning or recommend remedial work first. Cleaning should not go ahead blindly if the surface is already compromised.
Be cautious where you find:
- Blown render or hollow areas
- Open cracks or failed expansion joints
- Water ingress around windows or rooflines
- Badly chalking or powdery surface coatings
- Freshly applied render that has not cured properly
- Unidentified coatings or sealers
- Historic staining that may require specialist restoration
In these situations, professional judgement matters. Sometimes the safest recommendation is repair, re-coating or specialist inspection before cleaning.
Frequently Asked Questions
What is the safest way to clean coloured render?
The safest method is controlled softwashing after inspection and test patching. Use suitable cleaning chemistry at the correct dilution, apply at low pressure, manage dwell time, protect surrounding surfaces and rinse gently where required. Avoid high-pressure jetting and never use a turbo nozzle on coloured render.
Can coloured render be pressure washed?
High-pressure washing is not recommended on coloured render because it can scar the surface, cause wand marks, expose aggregate and force water behind the render. A gentle low-pressure rinse may be used after treatment where appropriate, but pressure should not be relied on as the main cleaning force.
Will softwashing bleach coloured render?
Correctly controlled softwashing should not bleach sound coloured render, but misuse can cause problems. Risks increase when chemicals are too strong, left to dry, applied unevenly or used on unstable, faded or previously coated surfaces. Always test first and follow product guidance.
How do you remove green algae from coloured render?
Green algae is usually treated with an appropriate softwash solution or biocidal cleaning method. The surface should be inspected, tested, protected, treated at low pressure and allowed suitable dwell time. Heavy growth may require staged treatment rather than aggressive washing.
How long does coloured render stay clean after softwashing?
This depends on exposure, shade, moisture, nearby trees, air pollution and building design. Some elevations may stay clean for several years, while damp north-facing walls can show regrowth sooner. Maintenance treatments help prevent heavy build-up and reduce future cleaning risk.
Can I clean coloured render myself?
Serious DIY users can clean small, accessible areas if they understand the surface, use suitable products safely and avoid pressure damage. However, larger elevations, heavy staining, chemical handling, access issues and commercial sites are best handled by trained professionals with proper equipment, PPE and documentation.
Conclusion: Clean the Growth, Protect the Finish
Cleaning coloured render safely is about control. The best results come from understanding the surface, identifying the staining, testing first, using the right chemistry, applying at low pressure and avoiding the temptation to blast the wall clean. Coloured render can look dramatically better after professional softwashing, but it can also be permanently damaged by heavy-handed methods.
For contractors and property professionals, safe render cleaning is also a credibility issue. Clients expect a clean building, but they also expect the colour, texture, plants, trims and surrounding materials to be protected. Proper training, documentation and careful product selection help deliver that standard consistently.
SoftWash UK supports the exterior cleaning industry with professional softwashing chemicals, equipment, training and educational resources for safe, responsible render cleaning. To build your knowledge further, explore the SoftWash UK Knowledge Centre, compare suitable cleaning products and equipment, or consider professional training before taking on sensitive coloured render projects.