The Safe Way to Clean Coloured Render
The safest way to clean coloured render is to use a controlled low-pressure cleaning process, correct chemical selection, careful dwell time, and thorough pre-testing before treating the whole surface. Coloured render should not be aggressively pressure washed, scrubbed with harsh abrasives, or treated with over-strength chemicals because these methods can cause patching, streaking, pigment loss, water ingress and permanent surface damage.
For UK exterior cleaning contractors, facilities managers, property maintenance teams and serious DIY users, the key is to identify the render type, understand the staining, test the cleaning method, protect surrounding surfaces and work within the product safety guidance. In most cases, a professional softwashing approach is safer and more effective than relying on high pressure alone, particularly when the discolouration is caused by algae, mould, biofilm and atmospheric soiling.
This guide explains how to clean coloured render safely, what to avoid, which methods suit different situations, and how to reduce the risk of damaging the finish.
Why Coloured Render Needs Careful Cleaning
Coloured render is popular on homes, commercial buildings, schools, healthcare sites, retail parks and apartment blocks because it provides an attractive decorative finish without the need for regular painting. However, the same textured surface that gives render its appearance also holds moisture, airborne dirt and organic growth.
In the UK climate, north-facing elevations, shaded walls and areas below trees often develop green algae, black mould, mildew and general staining. Coastal and urban properties may also suffer from salt deposits, pollution marks and traffic film. If left untreated, this build-up can make a relatively modern building look neglected and can contribute to longer-term surface deterioration.
The challenge is that coloured render is not just “dirty masonry”. It can be softer, more porous and more colour-sensitive than brick, stone or concrete. Poor technique can leave irreversible marks.
Common Types Of Coloured Render
Before choosing a cleaning method, identify the surface as accurately as possible. The term coloured render covers several systems, and they do not all respond the same way.
| Render type | Common features | Cleaning considerations |
|---|---|---|
| Monocouche render | Through-coloured mineral render, often scraped or textured | Can be porous and prone to pressure damage or scarring if cleaned too aggressively |
| Silicone render | Flexible, water-repellent, often used on modern insulated render systems | Usually responds well to low-pressure cleaning, but chemical compatibility should still be tested |
| Acrylic render | Resin-based decorative finish, available in many colours | Can be sensitive to solvents, heat and strong chemical exposure |
| Mineral render | Cementitious or lime-based finish, often painted or pigmented | May absorb moisture and cleaning solution quickly; dwell time and rinsing need control |
| Painted render | Render substrate with masonry paint coating | Cleaning method must suit the paint condition, not just the render beneath |
If you cannot identify the render type, proceed as though it is sensitive. A small test patch in an inconspicuous area is essential before committing to full elevation cleaning.
Softwashing Coloured Render: Why Low Pressure Matters
Softwashing uses low-pressure application of cleaning chemistry to treat organic contamination at the source. Rather than blasting dirt away with force, it relies on the correct solution, even coverage and controlled dwell time. If you are new to the method, SoftWash UK’s Knowledge Centre guide on softwashing explains the core principles in more detail.
On coloured render, this matters because high pressure can:
- Remove or roughen the surface finish
- Leave wand marks and zebra striping
- Drive water behind render systems and into insulation
- Open hairline cracks and weak areas
- Cause patchy drying and visible cleaning lines
- Dislodge loose, blown or poorly bonded render
Pressure washing is not always wrong, but it must be used cautiously and only where appropriate. For many render cleaning jobs, the safer approach is controlled chemical treatment followed by low-pressure rinsing where required. If you are comparing methods, the SoftWash UK guide to softwashing vs pressure washing is a useful reference.
What Actually Causes Staining On Coloured Render?
Accurate diagnosis is one of the biggest differences between professional render cleaning and guesswork. Not every stain should be treated in the same way.
Organic Growth
Green algae, black mould, mildew, lichen and biofilm are common on shaded or damp elevations. These are usually the best candidates for softwashing because the contamination is biological.
Atmospheric Soiling
Traffic film, soot, pollution and general dirt can bond to textured render. These stains may need a surfactant or detergent-assisted wash rather than biocide alone.
Mineral And Metal Staining
Rust from fixings, scaffold residue, irrigation staining, copper marks and lead staining require specific stain-removal products. Treating metal stains with the wrong chemical can make them worse.
Efflorescence
White salt deposits indicate moisture movement through the substrate. Cleaning may remove the visible deposit temporarily, but the source of moisture must be understood.
Physical Defects
Cracks, blown render, impact damage, failing sealant, leaking gutters and overflow pipes often create localised staining. Cleaning the wall without correcting the defect means the staining will return quickly.
The Safe Step-By-Step Process For Cleaning Coloured Render
The following process reflects how experienced contractors should approach coloured render cleaning on domestic and commercial properties. The exact products, dilutions and dwell times must always follow the manufacturer’s label, safety data sheet and site-specific risk assessment.
1. Survey The Building First
Start at ground level and work around the property before unloading equipment. Look for:
- Render type, texture and colour depth
- Cracks, hollow areas, loose beads and impact damage
- Failed silicone sealant around windows and doors
- Open vents, air bricks and mechanical intakes
- Electrical fittings, alarm boxes, cameras and lights
- Plants, lawns, ponds and sensitive landscaped areas
- Neighbouring property, vehicles and public access routes
- Drainage points and possible run-off routes
Photograph existing defects before starting. This protects the contractor and helps the client understand what cleaning can and cannot correct.
2. Identify The Contamination
If the wall is green or black in shaded areas, the issue is likely organic growth. If the marks are orange-brown below metal fixtures, rust staining is more likely. If dirt sits below window sills and architectural details, it may be atmospheric run-off.
Do not assume one product will solve everything. Professional render cleaning often involves staged treatment: biological growth first, then remaining mineral or metal stains only if suitable.
3. Carry Out A Test Patch
A test patch is non-negotiable on coloured render. Choose a discreet area and test the proposed cleaning solution and rinse method. Allow it to dry fully before making a decision. Render often looks different wet, so judging results too early can lead to mistakes.
Check for:
- Colour change or lightening
- Surface softening
- Patchiness after drying
- Unexpected reaction with previous coatings
- Improvement in organic staining
4. Prepare And Protect The Site
Good preparation prevents most complaints. Pre-wet sensitive vegetation, cover delicate plants where appropriate, divert run-off if needed, and protect metals, painted features and untreated timber. Confirm that windows are closed and ventilation intakes are considered.
On commercial sites, communicate with building users before work starts. Render cleaning near entrances, schools, healthcare premises or public footpaths needs clear exclusion zones, signage and supervision.
5. Select The Correct Cleaning Chemistry
The safest chemical is not always the weakest one; it is the one that is appropriate for the contamination, compatible with the surface and used correctly. SoftWash UK supplies a range of professional softwash chemicals, but product choice should be based on the render type, staining and required outcome.
For organic growth, contractors may use oxidising softwash solutions or biocidal treatments, depending on the site and specification. Some coloured render projects benefit from a slower-acting biocide, especially where a gentler approach and residual effect are desirable. For example, Soft Wash Pro 50 DDAC is a professional-grade biocide used for suitable exterior cleaning applications where ongoing biological control is part of the maintenance plan.
Where improved wetting and cling are required on textured vertical render, a suitable surfactant can help the solution spread more evenly and reduce rapid run-off. Clever Wash Surfactant is often used by professionals to improve contact time, but it should still be used according to guidance and only where appropriate.
6. Apply At Low Pressure
Apply the solution evenly from the bottom upwards or in controlled sections, depending on the system and product being used. Avoid flooding the wall. The aim is even wetting, not saturation.
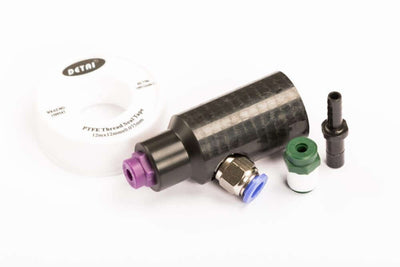
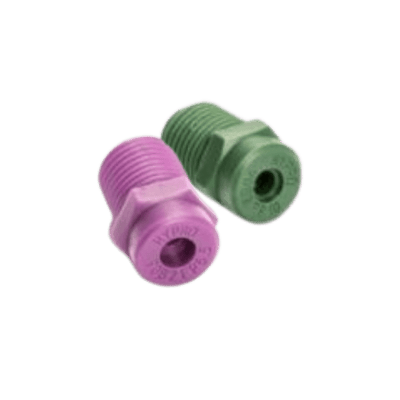
Useful application equipment for render includes low-pressure pumps, softwash nozzles and water-fed pole systems. A tool such as a water fed pole softwash nozzle can help apply solution or rinse at height without relying on aggressive pressure, subject to site access and working-at-height controls.
7. Control Dwell Time
Dwell time is the period the cleaning solution remains active on the surface. Too short, and the treatment may not work. Too long, and there may be unnecessary risk of drying, streaking or surface reaction.
On coloured render, never allow reactive cleaning solutions to dry on the surface unless the product is specifically designed and labelled for that use. Work in manageable areas, watch the weather and pause if direct sun or wind causes rapid drying.
8. Rinse Carefully Where Required
Some treatments require rinsing; others may be designed to remain on the surface. Follow the product label. Where rinsing is required, use low pressure and a wide fan pattern. The objective is to remove residues without cutting into the render texture.
Avoid forcing water behind beads, vents, seals, expansion joints or damaged render. Pay attention to window frames and sills, as residues can pool and later cause streaks.
9. Inspect After Drying
Final assessment should be made once the render has dried. Some biological staining continues to fade after treatment, particularly with biocidal approaches. Explain this to the client before starting so expectations are realistic.
If a second treatment is needed, it should be planned carefully rather than simply increasing chemical strength on the day.
Chemical Cleaning Options For Coloured Render
There is no single chemical answer for every coloured render job. The table below gives a practical overview.
| Cleaning option | Best suited to | Advantages | Key cautions |
|---|---|---|---|
| Low-pressure water rinse | Loose dirt, dust and light surface soiling | Low chemical exposure and simple process | Will not usually kill algae or mould at the root |
| Softwash oxidising treatment | Established organic growth and black/green staining | Fast visual improvement when used correctly | Must be diluted, tested and controlled to avoid colour or surface damage |
| Quaternary ammonium biocide | Maintenance treatments and longer-term biological control | Useful residual action and often gentler visual process | Results may be slower; still requires safe handling and correct application |
| Surfactant-assisted cleaning | Textured render, pollution film and improved dwell | Better wetting, cling and even coverage | Wrong use may leave residues if not compatible or rinsed when required |
| Specialist stain removers | Rust, lead, tannin or mineral staining | Targets specific stains more effectively | Must match the stain type; incorrect chemical choice can worsen marks |
If you are unsure what products are typically used in the trade, SoftWash UK’s guide to softwashing chemicals gives helpful background on the main chemical types and their applications.
Safety And Compliance Best Practice
Cleaning coloured render is not just a surface-care task. It involves working at height, chemical handling, public safety, environmental protection and client communication. Contractors should work to a written risk assessment and method statement, with COSHH information available for all chemicals on site.
Essential Safety Controls
- Wear suitable PPE, including gloves, eye protection and protective clothing
- Follow the product label and safety data sheet at all times
- Complete a site-specific risk assessment before work begins
- Control access below working areas
- Protect plants, metals, glass, painted surfaces and water features
- Prevent uncontrolled run-off into sensitive areas
- Use safe access methods for work at height
- Do not mix chemicals unless specifically instructed by the manufacturer
- Keep clean water available for rinsing and emergency dilution
For contractors who want a more professional documentation framework, SoftWash UK’s Risk Assessment and Method Statement pack for exterior cleaning can help support safer planning and clearer communication with commercial clients, facilities managers and principal contractors.
Common Mistakes When Cleaning Coloured Render
Using Too Much Pressure
This is the most common and costly mistake. High pressure may appear to clean quickly, but it can permanently scar the render or make the surface more porous, encouraging future staining.
Skipping The Test Patch
Render can react differently from one building to another, even when it looks similar. Previous coatings, age, porosity and pigment stability all affect the outcome.
Letting Chemical Dry On The Wall
Drying can cause streaks, patching and residues. Work in suitable weather and manageable sections.
Assuming Stronger Means Better
Increasing strength is not a substitute for correct diagnosis, dwell time and application technique. Over-application increases risk without guaranteeing a better result.
Cleaning Over Defects
If water is tracking from a leaking gutter, cracked coping stone or failed sealant joint, staining will return. Report defects rather than pretending cleaning is a permanent repair.
Promising A “Like New” Finish
Heavily weathered render, UV fading, impact damage and mineral staining may not fully disappear. Manage expectations before starting the job.
Softwashing Versus Pressure Washing For Coloured Render
| Factor | Softwashing | Pressure washing |
|---|---|---|
| Surface impact | Low mechanical force, surface-friendly when correctly tested | Higher risk of scarring, water ingress and texture damage |
| Organic growth control | Treats algae and mould more effectively at source | May remove visible growth but often leaves spores behind |
| Suitability for coloured render | Generally preferred where chemical compatibility is confirmed | Only suitable with great care and low pressure, if at all |
| Speed of visible result | Can be immediate or gradual depending on product | Immediate removal of loose dirt, but may not sanitise |
| Long-term cleanliness | Often lasts longer where biological growth is properly treated | Growth may return more quickly if roots and spores remain |
In many cases, contractors find that softwashing is the more controlled and professional option for coloured render. The expected lifespan of results depends on shade, moisture, surface texture, nearby trees and maintenance frequency. SoftWash UK’s guide on how long softwashing lasts explains the main factors that affect longevity.
Practical Tips For Contractors And Facilities Managers
For Domestic Render Cleaning
- Explain that some staining may continue to fade after treatment
- Protect lawns, borders and neighbouring property carefully
- Check window seals and vents before applying solution
- Avoid cleaning in hot sun or freezing conditions
- Provide before-and-after photographs for client confidence
For Commercial And Facilities Management Work
- Plan cleaning around building occupancy and public access
- Prepare RAMS and COSHH documentation before arrival
- Agree water access, drainage controls and exclusion zones
- Use test areas for client approval before full elevation cleaning
- Build render cleaning into planned maintenance rather than waiting for heavy staining
For Serious DIY Users
- Do not use patio cleaner or household bleach without understanding the surface risk
- Avoid hiring a high-powered pressure washer for coloured render
- Read the label and safety data sheet before handling any chemical
- Work from the ground where possible and avoid unsafe ladder work
- If access, staining or chemical selection is uncertain, speak to a trained professional
When Should Coloured Render Be Cleaned?
Coloured render is usually best cleaned before growth becomes heavily established. Light green algae is easier to treat than years of embedded black biofilm. As a general guide, inspect render annually and consider cleaning when:
- Green or black growth is visible on shaded elevations
- Staining is affecting the appearance of the property
- Organic growth is spreading around window reveals and sills
- Facilities teams are preparing a property for inspection, sale or lease
- Render is part of a planned exterior maintenance programme
Autumn and spring are common times for render cleaning, although work can be carried out throughout the year if weather conditions are suitable. Avoid strong sun, high winds, heavy rain and freezing temperatures.
How To Quote Coloured Render Cleaning Professionally
For contractors, coloured render cleaning should not be priced solely by square metre without considering risk and complexity. A small domestic elevation with easy access may be straightforward. A multi-storey commercial building with public access, sensitive landscaping and heavy biological growth requires more planning.
Include the following in your quotation process:
- Render type and condition
- Amount and type of staining
- Access requirements
- Water availability
- Plant, glass and metal protection
- Run-off management
- Number of treatments likely to be required
- Whether rinsing is included
- Client expectations and limitations
Good contractors do not sell “magic cleaning”. They explain the process, risks, likely results and maintenance options clearly.
If you want to see how professional softwashing training is structured before committing to the full programme, you can try selected lessons from the SoftWash UK course for free. It is a useful way to preview the training and understand the standards, safety thinking and practical approach behind professional softwashing.
Frequently Asked Questions About Cleaning Coloured Render
Can you pressure wash coloured render?
You can sometimes rinse coloured render at very low pressure, but aggressive pressure washing is not recommended. High pressure can damage the texture, create streaks, force water behind the render and cause permanent scarring. A low-pressure softwashing method is usually safer for biological staining.
Will softwashing bleach or fade coloured render?
It can if the wrong product, strength or dwell time is used. That is why a test patch, correct dilution, controlled application and product guidance are essential. Professional softwashing is about control, not simply applying strong chemicals.
What is the best cleaner for green algae on coloured render?
Green algae usually responds well to a suitable softwash or biocidal treatment. The best product depends on render type, colour, porosity, site conditions and whether immediate visual improvement or longer-term biological control is the priority.
Do you need to rinse coloured render after softwashing?
It depends on the product and method used. Some cleaning solutions require rinsing; some biocidal treatments may be designed to remain on the surface. Always follow the manufacturer’s instructions and consider the surface, weather and site risks.
How often should coloured render be cleaned?
Most properties benefit from inspection every year and cleaning when growth becomes visible. In shaded, damp or tree-covered locations, cleaning may be needed more frequently. Well-exposed walls with good airflow may stay clean for longer.
Can black stains be fully removed from render?
Often they can be significantly improved, especially if the staining is biological. However, long-term staining, UV fading, mineral marks or damaged render may not return to a perfect uniform finish. A test patch gives the most honest indication of likely results.
Conclusion: Clean Coloured Render With Control, Not Force
The safe way to clean coloured render is to diagnose the staining, test first, use low pressure, select compatible chemistry, control dwell time and protect the surrounding environment. The biggest risks come from rushing the job, using excessive pressure or assuming all render can be treated the same way.
For contractors and facilities managers, a professional render cleaning process improves results, reduces complaints and protects the building fabric. For serious DIY users, the message is simple: coloured render is not the place for guesswork, harsh scrubbing or high-powered blasting.
SoftWash UK supports the exterior cleaning industry with professional chemicals, softwashing equipment, training, safety resources and educational guidance. If you want to improve your render cleaning knowledge, explore safer methods, or build a more professional softwashing service, visit SoftWash UK and use the Knowledge Centre, product guidance and training resources to make better-informed decisions.