The Safe Way to Clean Coloured Render
Coloured render should be cleaned using a controlled softwashing process, not aggressive pressure washing. The safest approach is to identify the type of staining, carry out a small test patch, apply an appropriate exterior cleaning solution at the correct strength, allow a controlled dwell time, gently agitate only where needed, and rinse thoroughly at low pressure. This protects the render surface, preserves the coloured finish and removes organic growth such as green algae, red algae, lichen and atmospheric staining without unnecessary surface damage.
For UK exterior cleaning contractors, facilities managers, property maintenance teams and serious DIY users, the biggest risk is not usually the cleaning product itself. It is poor process: excessive pressure, over-strong chemical mixes, lack of pre-wetting, poor rinsing, cleaning in the wrong weather, or failing to protect surrounding surfaces. Coloured render can look robust, but many modern systems are relatively delicate at the surface, especially silicone render, acrylic render, monocouche render and textured through-coloured finishes.
This guide explains how to clean coloured render safely, what to avoid, how to choose the right method, and when professional products, equipment, training and compliance documentation are worth using.
Why coloured render needs a careful cleaning method
Coloured render is designed to provide both weather protection and a decorative finish. Unlike painted masonry, many coloured render systems contain pigment throughout the surface coat or finish coat. That does not mean the colour is indestructible. UV exposure, pollution, repeated wetting, algae growth and physical abrasion can all affect appearance over time.
Common coloured render systems in the UK include:
- Silicone render
- Acrylic render
- Mineral render
- Monocouche render
- Through-coloured render
- Textured render finishes such as scraped, roughcast or fine-grain finishes
- Branded systems such as K Rend, Weber, Parex and similar render systems
The challenge is that the staining usually sits on or within the surface texture, while the coloured finish can be susceptible to etching, patching or mechanical damage if treated harshly. This is why softwashing is commonly preferred for render cleaning, provided it is carried out correctly.
If you are specifically working on K Rend or similar through-coloured render, SoftWash UK has a dedicated guide on K-Rend cleaning, which is useful background before choosing your cleaning process.
What causes coloured render to become dirty?
Most coloured render does not become dirty evenly. North-facing walls, shaded elevations, areas below overhanging trees and sections around gutters or ledges often stain first. This is because moisture remains on the surface for longer, giving algae and biofilm more time to colonise the render texture.
Common causes of staining on coloured render
- Green algae: Often appears on shaded or damp elevations, especially where airflow is poor.
- Red algae: A common problem on render in the UK, often appearing as red, pink or orange streaking.
- Black organic staining: Can be caused by older algae, mildew, lichen or retained dirt within the texture.
- Atmospheric pollution: More common near roads, cities, industrial areas and coastal locations.
- Run-off staining: Usually seen beneath window sills, copings, leaking gutters or architectural details.
- Metal staining: Rust from fixings, railings, vents or metal fittings may require specialist treatment.
- Efflorescence: White mineral deposits caused by salts migrating through masonry or render.
Green organic growth is one of the most common reasons property managers request render cleaning. For more detail on why it develops, see SoftWash UK’s guide to green algae on render. Red staining is also widespread on rendered buildings, and the Knowledge Centre article on red algae on render explains why this type of staining often returns if the underlying conditions are not addressed.
Softwashing versus pressure washing coloured render
The safest method for coloured render is normally controlled softwashing with low-pressure application and low-pressure rinsing. Pressure washing can be useful on many hard external surfaces, but render is not block paving. High pressure can scar the surface, expose aggregate, force water behind the system, open hairline cracks, or leave wand marks that only become obvious once the wall dries.
| Method | Best suited to | Main risks on coloured render | Professional recommendation |
|---|---|---|---|
| High-pressure washing | Hard surfaces such as concrete, some paving and robust masonry | Surface erosion, streaking, blown render, water ingress, patchy colour loss | Avoid on coloured render unless manufacturer-approved and very carefully controlled |
| Low-pressure rinsing | Removing loose grime and rinsing after softwash treatment | Low risk when used correctly | Recommended as part of a controlled process |
| Softwashing | Organic staining, algae, red algae, biofilm and general render cleaning | Chemical misuse, poor dilution, poor rinsing or damage to surrounding plants and metals | Recommended when carried out by trained and competent users |
| Hand scrubbing only | Small areas, delicate details and localised deposits | Abrasion, uneven finish, labour-intensive results | Useful as a supporting technique, not usually enough for large algae-affected elevations |
SoftWash UK’s Knowledge Centre article on pressure washing render is worth reading before using any pressure washer on a rendered elevation. In practice, most experienced contractors will avoid high pressure on coloured render unless there is a very specific reason and the system can tolerate it.
The safe step-by-step process for cleaning coloured render
The following process reflects how competent contractors should approach render cleaning on residential, commercial and facilities-managed properties. The details may vary depending on the render type, staining, access and site conditions, but the principles remain the same.
Step 1: Survey the render before cleaning
Do not start with the chemical. Start with the building. A proper pre-cleaning inspection helps prevent avoidable damage and disputes.
Check for:
- Cracks, blown render, hollow areas or loose sections
- Failed sealant around windows, vents and service penetrations
- Open weep holes, air bricks and ventilation grilles
- Damaged trims, beads or exposed mesh
- Existing colour fade or patching
- Previous pressure washing marks
- Metal fixtures, lead, copper, aluminium or galvanised surfaces
- Plants, ponds, lawns and neighbouring properties at risk from overspray
Photograph the surface before work begins. For contractors and facilities managers, this protects both parties and supports a professional handover. It also helps identify whether staining is organic, mineral-based or caused by building defects such as leaking gutters.
Step 2: Identify the staining
Organic staining usually responds well to softwashing. Mineral staining, rust and efflorescence do not respond the same way and may require different chemistry or building repairs.
| Stain type | Typical appearance | Likely treatment approach |
|---|---|---|
| Green algae | Green film, often on shaded walls | Softwash treatment followed by low-pressure rinse |
| Red algae | Pink, red or orange staining, often streaked | Controlled softwash treatment; may need repeat dwell or second application |
| Black biofilm or mildew | Dark patches held in texture | Softwash treatment with careful dwell and rinsing |
| Rust staining | Orange-brown marks below metal fixings | Specialist rust remover, not standard render softwashing chemistry |
| Efflorescence | White crystalline deposits | Diagnosis first; may need moisture control and specialist treatment |
| Carbon pollution | Grey or black soiling near roads or vents | May need detergent-based cleaning and gentle agitation |
Step 3: Carry out a test patch
A test patch is not optional on coloured render. Choose a discreet area that represents the worst staining and the general render condition. Apply the proposed cleaning solution, allow an appropriate dwell time, rinse and allow the area to dry fully before assessing the result.
A test patch helps confirm:
- Whether the stain is treatable with softwashing
- Whether the colour remains stable
- Whether the surface is friable or chalking
- Whether the dwell time is suitable
- Whether additional rinsing or agitation is needed
On commercial buildings, test patches are also useful for client sign-off, especially where the render has aged unevenly.
Step 4: Protect the surrounding area
Before application, protect vulnerable surfaces and landscaping. This is a major part of safe softwashing and should be included in the method statement.
Best practice includes:
- Pre-wet plants, grass and sensitive landscaping
- Cover or divert water away from ponds and water features
- Mask or avoid sensitive metals where required
- Keep windows closed and inform occupants before work begins
- Control overspray, especially in wind
- Use spotters or exclusion zones in public areas
- Manage run-off responsibly and in line with site requirements
Contractors should work from a site-specific risk assessment and method statement. SoftWash UK supplies a Risk Assessment and Method Statement pack for exterior cleaning, which can help businesses structure safer, more professional documentation for this type of work.
Step 5: Choose the right cleaning solution
For organic growth on coloured render, professional softwashing often uses sodium hypochlorite-based solutions, surfactants and, in some cases, biocidal treatments. The key is using the correct dilution, applying it evenly and not allowing it to dry on the surface.
SoftWash UK supplies professional soft wash chemicals for exterior cleaning contractors, but any product should be selected according to the surface, stain type, label instructions, safety data, site conditions and operator competence.
Where sodium hypochlorite is appropriate, contractors commonly use professional-grade sodium hypochlorite for soft washing as part of a carefully measured dilution. It should never be used casually, mixed with incompatible chemicals, or applied without suitable PPE, COSHH assessment and environmental controls.
A surfactant can improve cling and wetting on vertical render, helping the solution stay in contact with the biofilm rather than running straight off the wall. Clever Wash surfactant is useful in this context because it supports more even coverage and controlled dwell on vertical exterior surfaces.
Step 6: Apply at low pressure
Application should be even and controlled. Avoid blasting the render. The aim is to wet the stained surface with the cleaning solution, not force water into the structure.
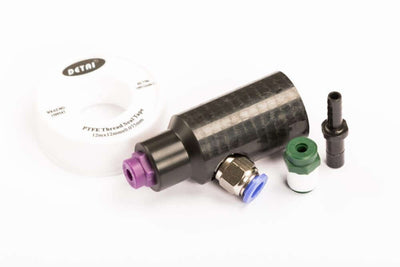
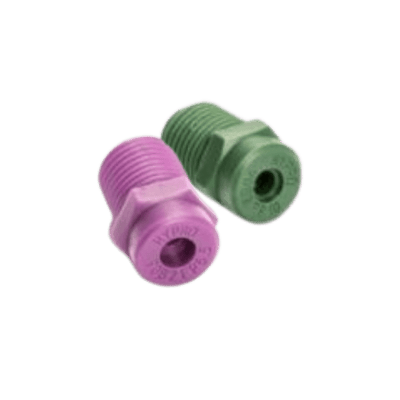
Use suitable softwash equipment, dedicated chemical-resistant components and a controlled spray pattern. For many render jobs, professional soft washing equipment gives better control than attempting to improvise with unsuitable pressure washing gear.
Start low and work methodically. Avoid heavy overspray, keep the working area manageable, and maintain communication with anyone controlling access or pedestrian movement below.
Step 7: Allow a controlled dwell time
Dwell time is where much of the cleaning happens. However, more is not always better. The solution should remain active long enough to break down organic staining, but it should not be allowed to dry on the render.
Factors affecting dwell time include:
- Render texture and porosity
- Severity of algae growth
- Air temperature
- Direct sunlight
- Wind conditions
- Product dilution and surfactant use
On a warm, breezy day, render can dry quickly. In those conditions, reduce the working area, re-wet if required, or postpone work if safe control is not possible. Cleaning in direct hot sun is a common cause of patchy results.
Step 8: Lightly agitate only where needed
Some textured render holds biofilm deep in the grain. Light brushing with a suitable soft brush may help, but aggressive scrubbing can polish, scar or flatten the texture. Never use wire brushes or abrasive pads on coloured render.
In most cases, chemical dwell and low-pressure rinsing should do the bulk of the work. Agitation should support the process, not replace it.
Step 9: Rinse thoroughly at low pressure
Rinsing is critical. Do not leave residues on the surface, around window frames or on adjacent materials. Use low-pressure water flow and work from the top down, taking care around vents, gaps, electrical fittings and seals.
Thorough rinsing helps prevent:
- Streaking
- Residue marks
- Unwanted reaction with metals or glass seals
- Damage to plants from run-off
- Customer complaints after drying
Step 10: Inspect after drying
Coloured render can look different when wet. Always inspect once dry where possible. Some heavy red algae or black biofilm may need a second controlled application rather than a stronger first application. Patience is safer than over-treatment.
Can softwashing damage coloured render?
Softwashing can damage render if it is done badly. When carried out correctly, it is generally one of the safest and most effective ways to remove organic growth from coloured render. The issue is not simply “softwashing” as a method; it is operator competence.
Damage is more likely when someone:
- Uses excessive chemical strength
- Allows chemicals to dry on the wall
- Fails to rinse properly
- Applies products to already damaged or friable render
- Mixes incompatible chemicals
- Works in unsuitable weather
- Uses high-pressure rinsing after treatment
For a deeper explanation, see SoftWash UK’s guide: can softwashing damage render. It is a useful resource for contractors explaining the process to customers who are nervous about chemical cleaning.
Safety and compliance notes for UK contractors
Render cleaning is not just a cosmetic task. It involves working at height, chemical handling, public protection, water management and potential environmental risk. Competent contractors should be able to show that they have considered these issues before starting work.
Key safety requirements
- Complete a site-specific risk assessment and method statement.
- Use appropriate PPE including eye protection, gloves, suitable footwear and respiratory protection where required.
- Follow COSHH requirements for any chemical products used.
- Read and follow product labels and safety data sheets.
- Never mix sodium hypochlorite with acids, ammonia-based products or incompatible chemicals.
- Control access below working areas and protect members of the public.
- Use appropriate access equipment and follow working-at-height regulations.
- Prevent uncontrolled overspray and manage run-off responsibly.
- Do not apply in high wind, heavy rain, freezing conditions or hot direct sunlight where control is compromised.
If your team is new to render softwashing, investing in professional training is far cheaper than repairing damaged render or dealing with an avoidable incident. The SoftWash UK Soft Wash Training Course is designed to help contractors understand chemical selection, application technique, safety, equipment and real-world exterior cleaning processes.
Common mistakes when cleaning coloured render
Mistake 1: Treating all stains as algae
Not every mark on render is organic. Rust, efflorescence, tannin, carbon pollution and construction staining may need different methods. Misidentifying the stain often leads to poor results and wasted time.
Mistake 2: Using too much pressure
One of the most common causes of visible damage is using a pressure washer too close to the render. This can leave zebra stripes, expose aggregate, break down the surface or drive water behind the system.
Mistake 3: Thinking stronger chemical means better cleaning
Over-strong mixes can increase risk without improving the final result. Correct dilution, surfactant use, dwell time and rinsing are usually more important than strength alone.
Mistake 4: Cleaning in poor weather
Wind creates overspray risk. Hot sun dries chemicals too quickly. Heavy rain dilutes products and creates run-off issues. Freezing temperatures increase slip hazards and may affect the surface. Choose conditions that allow control.
Mistake 5: Skipping the test patch
A test patch protects the contractor and the client. It is especially important on older coloured render, faded south-facing elevations and surfaces with unknown previous treatments.
Mistake 6: Forgetting the cause of staining
If algae is caused by blocked gutters, constant overflow, leaking downpipes or poor drainage, cleaning alone will not solve the problem. Facilities managers should combine render cleaning with basic building maintenance checks.
Best practice tips from real render cleaning work
On site, small details make a big difference. The following points are based on the type of practical issues contractors regularly face when cleaning coloured render in UK conditions.
- Work in sections: Large elevations are easier to control when divided into manageable areas.
- Watch lower walls: Run-off can concentrate at the bottom of elevations, so rinse these areas carefully.
- Be cautious around window seals: Avoid forcing water into frames and rinse residues from sills and reveals.
- Check neighbouring surfaces: Timber, metals, painted features and natural stone may react differently to cleaning products.
- Allow for delayed improvement: Some organic staining continues to lighten after treatment, especially where biocidal action is involved.
- Document the job: Before-and-after photos, test patch records and method statements improve professionalism and reduce disputes.
How often should coloured render be cleaned?
Most coloured render benefits from maintenance cleaning every one to three years, depending on exposure, shade, building design and local environment. North-facing elevations and tree-covered properties may need more frequent treatment. Open, sunny elevations may remain clean for longer.
For commercial sites, schools, residential blocks and managed estates, a planned maintenance approach is usually better than waiting until staining is severe. Light organic growth is easier to treat than deep, established biofilm.
FAQ: Cleaning coloured render safely
What is the safest way to clean coloured render?
The safest way is controlled softwashing with an appropriate cleaning solution, low-pressure application, careful dwell time and thorough low-pressure rinsing. Always inspect the render first, carry out a test patch and avoid high-pressure washing unless the render manufacturer confirms it is suitable.
Can I pressure wash coloured render?
Pressure washing coloured render is risky. High pressure can damage the surface, leave visible stripes, force water behind the system and cause long-term problems. If water rinsing is needed, use low pressure and good volume rather than aggressive force.
Will softwashing fade coloured render?
Correctly carried out softwashing should not normally fade sound coloured render. However, old, UV-faded, chalking or damaged render may already have unstable pigment. This is why a test patch is essential before cleaning the full elevation.
What removes red algae from coloured render?
Red algae usually responds to a controlled softwash treatment, although heavy staining may need repeat treatment or longer managed dwell time. Avoid simply increasing chemical strength; correct process is safer and more reliable.
Do I need to rinse after softwashing render?
In most render cleaning situations, yes. Thorough rinsing removes residues, dead organic matter and cleaning solution from the surface and surrounding details. Always follow the product instructions and the agreed method statement.
Can serious DIY users clean coloured render themselves?
Small, low-level areas may be manageable for competent DIY users who understand chemical safety, PPE, dilution, plant protection and low-pressure rinsing. Larger elevations, working at height, severe staining or commercial sites are better handled by trained professionals.
Conclusion: safe coloured render cleaning is about control
The safe way to clean coloured render is not to attack it with pressure. It is to inspect carefully, identify the staining, test first, use the right chemistry at the right strength, apply at low pressure, control dwell time and rinse thoroughly. This approach removes algae and biofilm while protecting the coloured finish and reducing the risk of surface damage.
For contractors and facilities teams, render cleaning is also a professionalism test. Clients expect clean results, but they also expect safe working, property protection, compliance and honest advice. If the render is damaged, if the staining is not organic, or if the weather is unsuitable, the safest decision may be to pause, test further or recommend remedial work before cleaning.
SoftWash UK supports the exterior cleaning industry with professional softwashing chemicals, equipment, training and educational resources. If you clean render commercially or want to improve your process, explore SoftWash UK’s product range, training options and Knowledge Centre guidance to work more safely, confidently and professionally on coloured render projects.