The Biggest Render Cleaning Mistakes
The biggest render cleaning mistakes usually come from treating render like concrete, brick or paving. Render is a finished building surface, not a hard-wearing slab, and the wrong pressure, chemical strength, dwell time or rinse method can cause etching, streaking, patchy results, blown render, water ingress and unhappy clients.
For UK exterior cleaning contractors, facilities managers, property maintenance teams and serious DIY users, the safest approach is to identify the render type, understand the staining, carry out a test patch, use the correct softwashing method, control run-off, protect nearby surfaces and work within a proper risk assessment. Most render cleaning failures are preventable when the process is planned properly.
This guide explains the most common render cleaning mistakes we see in the industry, why they happen, and how to avoid them on domestic, commercial and managed properties.
Why Render Cleaning Goes Wrong So Easily
Modern rendered buildings can look robust, but many render systems are sensitive to impact, abrasion, aggressive pressure washing and poor chemical handling. K-Rend, Weber, coloured monocouche render, silicone render, acrylic render, cement render and insulated render systems all behave differently.
The problem is that staining often sits on or within the textured surface. Organic growth such as algae, lichen and mould can root into pores and textured finishes. Pollution, carbon staining, rust, overflow marks and mineral staining may require a different approach altogether. If the operator jumps straight in with a pressure washer or strong chemical mix without understanding the cause of the staining, the clean can become expensive very quickly.
Before choosing a method, it helps to understand what is actually on the surface. SoftWash UK’s Knowledge Centre article on green algae on render is a useful starting point for identifying common biological growth on north-facing and shaded elevations.
Mistake 1: Pressure Washing Render Too Aggressively
One of the most common and costly render cleaning mistakes is using high-pressure washing as the main cleaning method. A pressure washer can remove visible dirt quickly, but it can also damage the render surface, open pores, drive water behind the facade and leave wand marks that only become obvious once the wall dries.
Render is particularly vulnerable where there are hairline cracks, failed sealant joints, weathered beads, hollow spots or previous repairs. High pressure can worsen these defects and may push moisture into the substrate or insulation system.
Common pressure washing damage on render
- Etched lines and tiger stripes from the lance pattern.
- Patchy colour loss on coloured render.
- Blown or hollow render where water gets behind the coating.
- Damaged silicone or acrylic top coats.
- Water ingress around window frames, vents and penetrations.
- Raised texture where the binder has been disturbed.
This does not mean water pressure has no place in render cleaning. Low-pressure rinsing and controlled agitation can be part of a safe process. The mistake is using pressure as the cleaning power rather than using chemistry, dwell time and correct technique. For a more detailed explanation, read SoftWash UK’s guidance on pressure washing render.
Mistake 2: Not Identifying the Render Type First
Different render systems require different levels of caution. A traditional sand and cement render may tolerate more mechanical cleaning than a delicate thin-coat silicone render over external wall insulation. K-Rend and other through-coloured renders have their own cleaning considerations, especially where stains have tracked down from coping stones, window sills or metal fixings.
Before cleaning, establish as much information as possible:
- Is the render cementitious, monocouche, silicone, acrylic, lime-based or part of an EWI system?
- Is it painted or through-coloured?
- Is the surface sound, hollow, cracked or friable?
- Are there manufacturer cleaning recommendations?
- Is the building under warranty or maintenance agreement?
If the property has K-Rend or a similar monocouche finish, take extra care with pressure, run-off lines and patch testing. SoftWash UK’s page on K-Rend cleaning explains the subject in more detail.
Mistake 3: Treating All Stains as Algae
Not every stain on render is green algae. Contractors often get poor results because they apply an algae treatment to rust, tannin, carbon, efflorescence, lead staining, fertiliser staining or mineral run-off. The surface may look dirty, but chemistry is stain-specific.
| Stain or growth | Typical appearance | Common cause | Cleaning consideration |
|---|---|---|---|
| Green algae | Green film or patches, often on shaded elevations | Moisture, shade, airborne spores | Usually responds well to correct softwashing and controlled dwell time |
| Red algae | Pink, red or orange staining | Micro-organisms thriving on damp render | May need patience, repeat treatment and realistic client expectations |
| Black staining | Dark streaks or carbon deposits | Pollution, traffic, combustion deposits or biological staining | Identify whether organic or atmospheric before choosing treatment |
| Rust marks | Orange or brown streaks | Metal fixings, irrigation, fertiliser or contaminated water | Requires suitable rust stain chemistry, not an algae wash |
| Efflorescence | White powdery or crystalline deposits | Moisture carrying salts to the surface | Do not simply bleach; address moisture source and use appropriate method |
Red or pink staining is particularly common on certain rendered buildings and can be more stubborn than green surface algae. The Knowledge Centre guide on red algae on render explains why this staining develops and what affects its removal.
Mistake 4: Using Chemicals Without Understanding Strength, Dwell Time and Surface Suitability
Softwashing is not simply “putting bleach on a wall”. Responsible render cleaning requires correct dilution, suitable surfactants, controlled application, dwell time, monitoring, safe rinsing and proper protection of adjacent surfaces.
Using a solution that is too weak can waste time and leave staining behind. Using a solution that is too strong can increase risk to the surface, plants, metals, painted areas, seals, glass and operatives. Poor technique is usually the issue, not the concept of softwashing itself.
When sodium hypochlorite is used professionally, it must be handled with care and in line with product information, site controls and legal responsibilities. Contractors should use appropriate PPE, avoid unsafe mixing, manage run-off, protect vegetation and prevent public exposure. SoftWash UK supplies professional soft wash chemicals, but product selection should always be matched to the surface, staining and site conditions.
Why surfactant choice matters
A quality surfactant helps the cleaning solution cling to vertical render, wet the surface evenly and reduce rapid run-off. Without one, the chemical may race down the wall, over-treat lower areas and under-treat upper areas. That is a common cause of streaking and inconsistent results.
For vertical exterior surfaces, a professional surfactant such as Clever Wash Surfactant can help improve contact time and coverage when used correctly as part of a controlled softwashing process.
Mistake 5: Skipping the Test Patch
A test patch is not optional on render. It is a practical safeguard that helps confirm surface reaction, expected cleaning result, dwell time, rinse method and client expectations before committing to the full elevation.
A good test patch should be:
- In a discreet but representative area.
- Large enough to show how the render will dry.
- Performed using the intended cleaning method.
- Observed after rinsing and again once dry.
- Recorded with photographs for client approval.
On commercial sites, test patches are especially important where multiple parties are involved, such as facilities managers, landlords, tenants, insurers or building surveyors. The clean may technically improve the surface, but if the client expected a “new render” finish, the job can still become a dispute. A test patch helps set realistic expectations.
Mistake 6: Cleaning Without Inspecting the Building First
A pre-clean inspection is one of the habits that separates professional render cleaning from guesswork. Many failures are caused by defects that were already present but not recorded before the work started.
What to check before cleaning render
- Hairline cracks and open joints.
- Blown, hollow or delaminating render.
- Failed mastic around windows and doors.
- Loose vents, lights, CCTV brackets and signage.
- Damaged coping stones, gutters or downpipes causing staining.
- Metal fixings that may react or cause rust marks.
- Planting, ponds, lawns and sensitive landscaping near the work area.
- Access restrictions, public routes and overspray risks.
Photograph everything. Make notes. If defects are present, explain them to the client before cleaning. Render cleaning should not be used to hide building maintenance issues. In many cases, the staining will return unless the moisture source is corrected.
Mistake 7: Poor Plant, Metal and Surface Protection
Render cleaning often takes place above flower beds, lawns, powder-coated frames, lead flashing, aluminium trims, painted doors, timber cladding and stone features. If these areas are not protected, rinsed and monitored, the clean can create secondary damage.
Good protection practices include:
- Pre-wetting plants and soil before application.
- Using sheeting carefully where suitable, without trapping heat or damaging plants.
- Diverting or controlling run-off where practical.
- Rinsing sensitive surfaces before, during and after application.
- Avoiding application in wind that could carry overspray.
- Checking metals, glass and painted surfaces frequently.
Do not assume that because a solution is diluted it cannot cause harm. A professional method statement should cover adjacent surface protection, public safety, access equipment, emergency procedures and environmental controls.
Mistake 8: Working Without Proper RAMS, PPE and Compliance Controls
Render cleaning can involve work at height, chemical application, water management, public interfaces, manual handling and sometimes traffic or pedestrian control. For contractors and facilities managers, proper documentation is not just paperwork; it is part of safe delivery.
A suitable risk assessment and method statement should cover:
- Chemical storage, transport, dilution and application.
- PPE requirements, including eye, skin and respiratory considerations where relevant.
- Work at height controls, including towers, MEWPs, ladders or pole systems.
- Exclusion zones and public protection.
- Weather limitations, especially wind and heat.
- Run-off management and environmental protection.
- Emergency spill and first aid procedures.
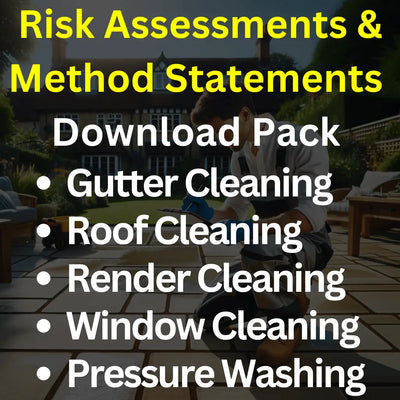
SoftWash UK’s Risk Assessment and Method Statement Pack for Exterior Cleaning can help contractors build more consistent documentation for exterior cleaning tasks, but it should always be adapted to the specific site and method being used.
Mistake 9: Applying Product in the Wrong Weather
Weather has a major effect on render cleaning results. Direct sun, high temperatures, rain and wind can all create problems.
| Weather condition | Why it causes problems | Best-practice response |
|---|---|---|
| Hot direct sunlight | Solution dries too quickly, causing streaking and reduced dwell time | Work in cooler periods, smaller sections and keep the surface controlled |
| Strong wind | Overspray risk to people, cars, plants and neighbouring properties | Postpone or change method if overspray cannot be controlled |
| Heavy rain | Dilutes the treatment and increases uncontrolled run-off | Delay work unless the method is designed for those conditions |
| Freezing conditions | Surface and access hazards, poor chemical performance | Avoid cleaning until safe temperatures return |
A common real-world mistake is to clean a south-facing rendered wall on a hot summer afternoon. The operator applies too much solution to compensate for rapid drying, the top dries unevenly, run-off marks appear below the windows, and the wall has to be re-treated. Better planning would have avoided the issue.
Mistake 10: Overlooking Access and Application Technique
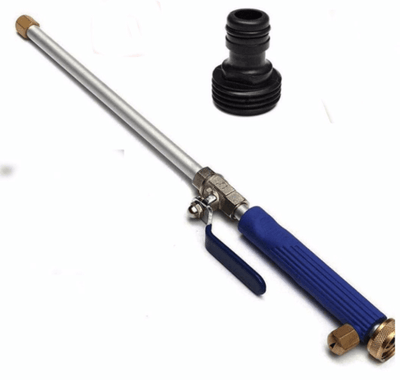
Poor access leads to poor cleaning. If the operative cannot apply evenly, monitor dwell time and rinse safely, the finished result will suffer. On larger rendered elevations, water-fed pole systems, controlled softwash nozzles, scaffold towers or MEWPs may be required depending on height, site layout and risk assessment.
Professional soft washing equipment helps deliver the cleaning solution at low pressure and more consistent flow rates than improvised equipment. However, equipment does not replace skill. Operators still need to understand overlap, dwell time, section control and how the surface is reacting.
Mistake 11: Expecting One Treatment to Solve Every Problem Instantly
Some render cleans produce an immediate visual improvement. Others continue to improve over days or weeks as organic matter breaks down and weathering assists the process. Stubborn red algae, deep biological growth and long-neglected elevations may require repeat treatment or staged cleaning.
Setting expectations is essential. Tell the client what should improve immediately, what may lighten over time and what may not be removable without repair, repainting or specialist stain treatment. Honesty at survey stage is better than trying to explain limitations after the job.
Mistake 12: Not Understanding Whether Softwashing Can Damage Render
Softwashing is often the safest professional approach for biological contamination on render when it is carried out correctly. But poor softwashing technique can still cause problems. Over-strong mixes, poor rinsing, unsuitable chemicals, missed test patches and lack of protection can damage surfaces or nearby materials.
The question is not simply whether softwashing is safe or unsafe. The real question is whether the operator understands the surface, product label, dilution, dwell time, site controls and aftercare. For a balanced explanation, read SoftWash UK’s article: can softwashing damage render.
A Best-Practice Render Cleaning Process
The safest render cleaning method will vary by site, but the following process works as a practical framework for professional contractors and competent property maintenance teams.
Step 1: Survey the property
Identify the render type, staining, access requirements, surrounding risks, drainage, vegetation, defects and client expectations. Take photographs before work begins.
Step 2: Identify the staining
Confirm whether the issue is green algae, red algae, mould, lichen, carbon staining, rust, efflorescence or another contaminant. Do not assume one product will solve every mark.
Step 3: Prepare RAMS and site controls
Plan PPE, access, exclusion zones, chemical handling, run-off control, emergency procedures and public protection. For commercial work, agree the method with the client or facilities manager before starting.
Step 4: Protect adjacent surfaces
Pre-wet plants, protect sensitive surfaces, move vehicles, isolate vulnerable areas where required and check weather conditions. Be particularly careful around aluminium, lead, painted timber, natural stone and delicate planting.
Step 5: Carry out a test patch
Use the intended method in a controlled area. Assess the result when wet and dry. Adjust dwell time, concentration or technique if required.
Step 6: Apply carefully in manageable sections
Apply from a safe working position using low pressure and even coverage. Avoid flooding the wall. Start with manageable areas so you can maintain control of dwell time and run-off.
Step 7: Monitor dwell time
Do not let the solution dry on the surface unless the product and method specifically allow it. Re-wet or rinse as required. Watch for unexpected reactions on trims, metals or painted details.
Step 8: Rinse or leave as specified by the method
Some treatments require rinsing; others may be designed to remain and work over time. Follow product guidance and site requirements. Where rinsing is needed, use controlled low pressure rather than aggressive blasting.
Step 9: Final inspection and client handover
Check the surface, surrounding areas, windows, plants and run-off paths. Explain what has been achieved, what may continue to improve and any maintenance issues that could cause staining to return.
Render Cleaning Myths That Cause Problems
Myth: “A turbo nozzle will clean render faster”
It may remove visible dirt quickly, but it can also permanently scar the render. Speed is not a substitute for surface-safe cleaning.
Myth: “If the stain is still visible, just make the mix stronger”
Stronger is not always better. The stain may not be organic, the dwell time may be wrong, or the surface may require staged treatment. Increasing concentration without diagnosis raises risk.
Myth: “All render can be cleaned the same way”
Render systems vary widely. A method that works on one property may be unsuitable for another, especially with thin-coat systems and older patched render.
Myth: “Training is only for beginners”
Experienced contractors benefit from structured training because it standardises safe methods, chemical understanding, pricing confidence and professional documentation. The SoftWash UK Soft Wash Training Course is designed to help operators improve practical knowledge and reduce avoidable mistakes on sensitive surfaces such as render.
FAQ: Render Cleaning Mistakes
What is the safest way to clean render?
The safest method is usually a controlled softwashing process following a site survey, test patch, suitable chemical selection, low-pressure application and appropriate protection of surrounding surfaces. The exact method depends on the render type, staining and condition of the building.
Can you pressure wash rendered walls?
Rendered walls can sometimes be rinsed at low pressure, but aggressive pressure washing is a common cause of damage. High pressure can etch the surface, leave stripes, force water behind the render and worsen existing defects.
Why does algae keep coming back on render?
Algae returns when the conditions remain favourable: shade, moisture, poor airflow, leaking gutters, nearby vegetation or porous surfaces. Cleaning removes the contamination, but long-term control depends on reducing moisture sources and using an appropriate maintenance schedule.
Do you always need chemicals to clean render?
Not always, but biological staining on textured render often responds best to correct softwashing chemistry rather than mechanical force. Non-organic stains such as rust, efflorescence or mineral deposits may need different specialist products and should not be treated as algae.
How often should render be cleaned?
Many UK rendered properties benefit from inspection every 12 months and cleaning every few years, depending on location, shade, exposure and moisture. Coastal, wooded, north-facing or high-pollution sites may need more frequent maintenance.
Can serious DIY users clean their own render?
Some small, low-risk areas may be suitable for competent DIY users, but work at height, chemical handling, delicate render systems and large elevations are best approached with professional training, equipment and safety planning. If in doubt, seek professional advice before attempting the work.
Conclusion: Good Render Cleaning Is About Control, Not Force
The biggest render cleaning mistakes come from rushing the job, misidentifying the stain, using too much pressure, applying chemicals without control, skipping the test patch and failing to protect the site. Render cleaning is a technical exterior cleaning task, especially on modern UK buildings with coloured, textured or insulated systems.
A professional result comes from careful inspection, correct diagnosis, suitable softwashing chemistry, low-pressure application, controlled dwell time, good rinsing practice, proper documentation and honest client communication. The best contractors do not rely on brute force; they use knowledge, planning and methodical working practices.
SoftWash UK supports exterior cleaning professionals with practical education, professional chemicals, equipment and training for safer, more consistent render cleaning. To build your knowledge further, explore the SoftWash UK Knowledge Centre, review suitable render-safe softwashing products, and consider professional training before tackling sensitive or high-value surfaces.
If you want to reduce mistakes, improve safety and deliver better results on rendered properties, visit SoftWash UK for professional softwashing chemicals, equipment, training and industry guidance.