The Safe Way to Clean Coloured Render
Coloured render should be cleaned with a low-pressure, chemistry-led process that removes organic growth and soiling without damaging the surface, stripping pigment, driving water behind the render system or leaving patchy bright marks. In most cases, the safe method is to identify the render type and staining, carry out a small test patch, pre-wet and protect sensitive areas, apply the correct softwash solution at a controlled strength, allow suitable dwell time, gently agitate where needed, then rinse at low pressure.
For UK exterior cleaning contractors, facilities managers, property maintenance teams and serious DIY users, the key point is this: coloured render is not a surface to “blast clean”. It is a finished façade system. The wrong pressure, chemical strength, nozzle choice or dwell time can cause visible damage that is far harder to correct than the original algae or staining.
This guide explains how to clean coloured render safely, how to choose the right method, what mistakes to avoid, and when professional training, documentation and specialist products are worth using.
Why Coloured Render Needs a Different Approach
Coloured render is designed to provide both weather protection and a decorative finish. Unlike bare brick, concrete or stone, the colour is part of the finished appearance. Depending on the system, the colour may be through-coloured, tinted, painted, silicone-based, acrylic-based or mineral-based.
Common UK render systems include:
- Silicone render
- Acrylic render
- Mineral render
- Monocouche render
- Through-coloured cementitious render
- Painted render and masonry coatings
- External wall insulation render systems
These surfaces often become stained by algae, mould, mildew, lichen, traffic film, carbon deposits, rust run-off, lead staining, irrigation marks and general atmospheric pollution. North-facing elevations, shaded walls, coastal properties, tree-lined sites and buildings near busy roads are particularly prone to green and black organic staining.
The challenge is that many coloured renders are relatively porous, textured and sensitive to aggressive cleaning. High pressure can cut lines into the texture, expose aggregate, cause water ingress, blow joints, damage trims or leave wand marks. Strong or poorly controlled chemicals can create bleaching, streaking or uneven colour change.
What Is the Safest Cleaning Method for Coloured Render?
The safest method is usually a controlled softwashing process using low pressure and the correct cleaning chemistry for the staining present. Softwashing is not simply “spraying chemicals”. Done properly, it involves surface assessment, dilution control, plant and property protection, careful application, dwell management and a controlled rinse.
For organic growth such as algae, mould and mildew, a professional biocidal softwash treatment is normally more effective and safer than pressure washing. For ingrained grime, a suitable surfactant or detergent may be needed to help lift contamination from the textured surface. For specific stains such as rust, lead staining or oil, a targeted stain remover may be required rather than a general render wash.
Contractors who regularly clean rendered façades should understand product labels, Safety Data Sheets, dwell times, runoff control and UK health and safety responsibilities. SoftWash UK provides professional softwash chemicals, equipment and training resources for exterior cleaning professionals who want to work safely and consistently.
Common Types of Soiling on Coloured Render
Before choosing a cleaning method, identify what you are actually trying to remove. Many poor outcomes happen because the same mix is used on every stain.
| Soiling or stain | Typical appearance | Likely cause | Best approach |
|---|---|---|---|
| Algae | Green film or streaks, usually on shaded elevations | Moisture, shade, airborne spores | Softwash biocidal treatment, low-pressure rinse if required |
| Black mould or mildew | Dark speckling or staining | Damp microclimate and organic contamination | Controlled softwash treatment with adequate dwell time |
| Lichen | Spots or crusty growth, often more stubborn | Long-term colonisation | Biocidal treatment, patience, repeat treatment if needed |
| Traffic film and carbon | Grey or black general dullness | Road pollution and airborne grime | Detergent/surfactant cleaning with gentle agitation |
| Rust stains | Orange or brown runs | Metal fixings, irrigation, railings or fittings | Targeted rust stain remover, not general softwash |
| Efflorescence | White powdery marks | Mineral salts migrating through masonry | Careful diagnosis; avoid trapping moisture or over-wetting |
Step-by-Step: How to Clean Coloured Render Safely
1. Identify the Render System and Condition
Start with a close visual inspection. Look for cracks, blown render, failed seals, open joints, damaged beads, staining below metal fixtures, poor drainage, overflowing gutters and areas where water may enter the building envelope.
On external wall insulation systems, be especially cautious around window reveals, trims, vents and junctions. These systems are not designed for aggressive pressure washing. If the wall sounds hollow, has cracks or shows signs of delamination, cleaning may need to be delayed until repairs are completed.
2. Confirm the Staining Type
Green and black biological growth responds differently to rust, carbon, paint staining or mineral deposits. If you are unsure, test in a small inconspicuous area before committing to the whole elevation.
A good test patch should answer:
- Does the staining respond to the chosen chemistry?
- Does the render colour remain stable?
- Is agitation required?
- How long is the safe dwell time?
- Does the rinse leave streaks or patchiness?
3. Prepare the Site and Protect Surroundings
Safe render cleaning starts before any chemical is applied. Walk the site and consider people, plants, pets, ponds, vehicles, signage, electrical fixtures and neighbouring properties.
Good preparation includes:
- Completing a risk assessment and method statement for the task
- Checking weather, wind direction and rainfall forecast
- Protecting sensitive plants and pre-wetting vegetation
- Moving or covering vehicles, outdoor furniture and signage
- Isolating or protecting external electrical points where necessary
- Planning safe access for work at height
- Managing runoff in line with site conditions and local requirements
For contractors, written documentation is part of professional working practice. A suitable Risk Assessment and Method Statement pack for exterior cleaning can help standardise safer working, especially when cleaning render on commercial or managed sites.
4. Choose the Right Cleaning Solution
There is no single chemical that is correct for every coloured render job. The safest choice depends on the render type, colour stability, contamination and desired result.
For organic growth, many professionals use a biocidal softwash treatment. For heavily soiled textured render, a surfactant can help the cleaning solution wet out the surface evenly and cling long enough to work. A product such as Clever Wash Surfactant can be useful where improved dwell, wetting and coverage are needed, particularly on vertical façades.
Where sodium hypochlorite is considered, it must be used responsibly, correctly diluted and only after compatibility testing. Strong bleach-based mixes can lighten organic staining quickly, but they can also damage sensitive surfaces, affect pigments, corrode metals, harm plants and create uneven results if used carelessly. Always work to the product label, Safety Data Sheet and site-specific risk assessment.
5. Apply at Low Pressure
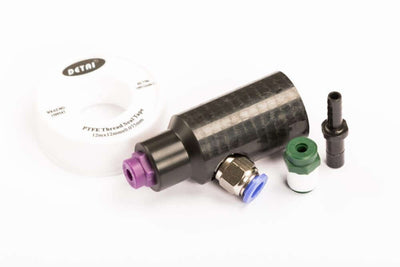
Use low-pressure application equipment and avoid forcing water into the render. A fan pattern or softwash nozzle is usually preferable to a narrow jet. For upper elevations, contractors often use controlled softwash systems or pole-based application methods.
A specialist water fed pole softwash nozzle can help apply solution at height while keeping pressure controlled. This is particularly useful where access is limited and scaffold or MEWPs are not justified for lighter maintenance treatments.
6. Manage Dwell Time Carefully
Dwell time is where a lot of the cleaning happens. However, longer is not always better. On coloured render, allowing chemicals to dry on the surface can cause streaking, residue marks or uneven colour change.
Work in manageable sections. Keep the surface damp during dwell if the product instructions allow it, but do not flood the wall. Avoid working in direct hot sun if it causes rapid drying. Windy days can also create overspray and uneven coverage.
7. Agitate Only Where Needed
Textured render can hold grime in pores and ridges. Gentle agitation with a suitable soft brush can improve results, especially on traffic film and atmospheric dirt. Avoid harsh scrubbing pads, wire brushes or abrasive tools, as these can polish, scratch or disturb the render texture.
8. Rinse Gently and Evenly
If rinsing is required, rinse from the bottom up initially to reduce streaking, then finish with a controlled top-down rinse. Keep pressure low and maintain a safe distance from the render. Do not chase stains with a turbo nozzle or narrow high-pressure jet.
Where a no-rinse biocidal treatment is used, make sure the client understands that results may continue improving over days or weeks as remaining organic material dies back and weathers away. This is common on roofs and some render maintenance projects, but expectations must be clearly explained.
9. Inspect, Document and Advise on Maintenance
After cleaning, inspect the wall under different light if possible. Render can look clean when wet but reveal shadows or remaining marks as it dries. Take before-and-after photographs, note any pre-existing defects and advise the client on likely re-growth factors.
Longer-lasting results depend on moisture management. Blocked gutters, leaking downpipes, overhanging trees, poor airflow and constant shading will shorten the clean appearance of the façade.
Softwashing vs Pressure Washing Coloured Render
Pressure washing may have a role in some exterior cleaning tasks, but coloured render is rarely a surface where high pressure is the safest first choice. A softwashing approach is usually more controlled and less invasive.
| Method | Advantages | Risks on coloured render | Best use |
|---|---|---|---|
| High-pressure washing | Fast physical removal of loose dirt | Etching, wand marks, water ingress, blown render, exposed aggregate | Only with extreme caution and suitable surfaces |
| Softwashing | Treats organic growth at low pressure, less mechanical damage | Chemical misuse can cause bleaching or staining if not controlled | Algae, mould, mildew and routine façade maintenance |
| Detergent wash with agitation | Useful for grime, traffic film and surface dirt | May not kill biological growth fully | Light soiling and pollution deposits |
| Targeted stain treatment | Addresses rust, lead, oil or mineral staining specifically | Wrong chemical can worsen staining | Localised non-organic stains |
Common Mistakes When Cleaning Coloured Render
Using Too Much Pressure
The most common mistake is trying to restore render with pressure alone. This may remove algae quickly, but it can also scar the surface and leave permanent lines. Once the texture or pigment has been damaged, cleaning cannot simply put it back.
Mixing Chemicals Too Strong
A stronger mix does not automatically mean a better or safer result. Over-strength solutions can lighten coloured render, corrode fittings, burn vegetation and increase risk to the operator and the public. Start with the least aggressive effective method and build only when testing proves it is necessary.
Skipping the Test Patch
Coloured render can vary significantly from one property to another. Age, UV exposure, previous coatings, repairs and manufacturer differences all affect how the surface reacts. A test patch is not optional on high-value or visibly sensitive façades.
Letting Product Dry on the Wall
Chemicals drying on render can leave tide marks, streaks and patchy residues. Work in sections and keep control of dwell time, especially on warm, windy or south-facing elevations.
Cleaning Without Fixing the Moisture Source
If a wall is stained because a gutter is overflowing or a downpipe joint is leaking, cleaning alone is a short-term cosmetic fix. The cause should be corrected or the staining will return quickly.
Safety and Compliance Best Practice
Render cleaning involves working with chemicals, water, access equipment and public-facing work areas. Contractors should follow UK health and safety requirements, product labels and Safety Data Sheets, and should complete a site-specific risk assessment before work begins.
Key safety points include:
- Wear appropriate PPE, including eye protection, gloves and suitable footwear
- Control overspray, especially near roads, pedestrians and neighbouring properties
- Never mix incompatible chemicals
- Use only labelled containers and correct dilution procedures
- Protect plants, ponds and sensitive surfaces
- Prevent slips, trips and uncontrolled public access to the work area
- Follow safe working at height procedures
- Keep Safety Data Sheets available on site
For contractors who want to improve their technical knowledge and reduce costly mistakes, the SoftWash UK Soft Wash Training Course covers professional softwashing methods, chemical handling and practical application principles. Training is especially valuable when working on coloured render, commercial façades and sensitive substrates where the margin for error is small.
Practical Tips for Better Results on Coloured Render
- Clean whole elevations where possible: Spot cleaning can leave visible clean patches on aged render.
- Work with the weather: Overcast, mild conditions are often better than hot sun or strong wind.
- Control expectations: Some staining, especially long-term lichen shadows or mineral marks, may need repeat treatment or specialist products.
- Protect metals: Rinse aluminium, lead, galvanised steel and painted fittings before and after chemical exposure.
- Use the right nozzle: Low-pressure, even application reduces streaking.
- Keep records: Note mix ratios, dwell times and test patch results for future maintenance cycles.
- Avoid unnecessary abrasion: Let chemistry do the work where possible.
When Should Coloured Render Be Cleaned?
Most coloured render benefits from maintenance cleaning before staining becomes heavy. Once algae and grime have been allowed to sit for years, they become more difficult to remove and may penetrate deeper into textured surfaces.
For commercial properties, schools, housing associations and managed buildings, a planned façade maintenance schedule is usually better than reactive cleaning. Typical intervals may range from annually on damp, shaded sites to every three to five years on more exposed elevations. The correct frequency depends on orientation, local environment, render type and client expectations.
The SoftWash UK Knowledge Hub is a useful educational resource for contractors and maintenance professionals who want to understand exterior cleaning methods, substrate care and responsible softwashing practice in more depth.
Can Serious DIY Users Clean Coloured Render?
Some light render cleaning can be carried out by competent DIY users, but there are limits. If the wall is high, heavily stained, close to sensitive areas, part of an external wall insulation system or requires chemical treatment, professional help is often the safer option.
DIY users should avoid high-pressure blasting, unlabelled chemical mixes, strong bleach solutions and working at height without proper equipment and training. If you are not confident identifying the render system or staining, it is better to seek advice before starting.
FAQs About Cleaning Coloured Render
Can you pressure wash coloured render?
You can rinse some coloured render at low pressure, but high-pressure washing is risky and often inappropriate. It can leave permanent lines, damage the texture, force water behind the render and expose aggregate. A low-pressure softwashing method is usually safer for algae, mould and mildew.
Will softwashing bleach coloured render?
Softwashing should not bleach render when the correct product, dilution, dwell time and rinse process are used. However, over-strength chemicals, poor testing or allowing product to dry can cause uneven lightening or streaking. Always complete a test patch and follow the product label and Safety Data Sheet.
What removes green algae from coloured render?
Green algae is normally best removed with a suitable biocidal softwash treatment applied at low pressure. The solution should be matched to the surface, allowed to dwell under control and rinsed if required. Heavy growth may need more than one treatment.
How often should coloured render be cleaned?
Many rendered properties benefit from cleaning every one to three years, depending on shade, moisture, exposure and local pollution. North-facing walls, coastal properties and buildings near trees often need more frequent maintenance.
Can I use household bleach on coloured render?
Household bleach is not recommended as a casual DIY render cleaner. It is not designed for controlled exterior softwashing, may contain additives, and can damage plants, metals and coloured surfaces if misused. Professional exterior cleaning products, proper dilution and safe working methods are a better approach.
Why does render go green again after cleaning?
Green staining returns when the conditions that support algae remain present. Shade, dampness, poor airflow, leaking gutters and nearby vegetation all contribute. A professional maintenance plan and correction of moisture sources will improve the length of time the render stays clean.
Conclusion: Clean Coloured Render Gently, Methodically and Professionally
The safe way to clean coloured render is to treat it as a finished façade system, not a hard surface to be blasted. Identify the render and staining, test first, protect the site, use low pressure, choose the right cleaning chemistry and manage dwell time carefully. Most damage happens when operators use too much pressure, too strong a mix or too little preparation.
For contractors and facilities teams, safe render cleaning is also about professionalism: clear documentation, good communication, correct PPE, responsible chemical handling and realistic client expectations. Done properly, softwashing can restore the appearance of coloured render while reducing the risk of surface damage and premature deterioration.
If you want to clean coloured render more safely and consistently, SoftWash UK can help with professional chemicals, softwashing equipment, training and educational resources. Visit SoftWash UK to explore suitable products, learn more about best practice and build a safer, more knowledgeable approach to exterior cleaning.